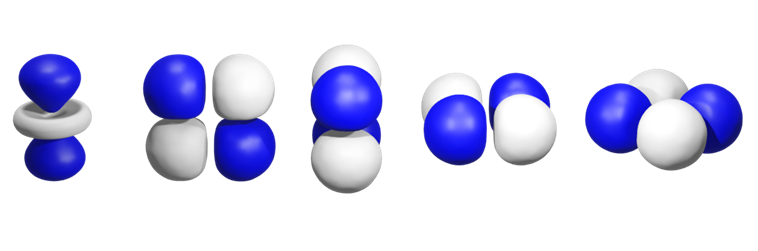
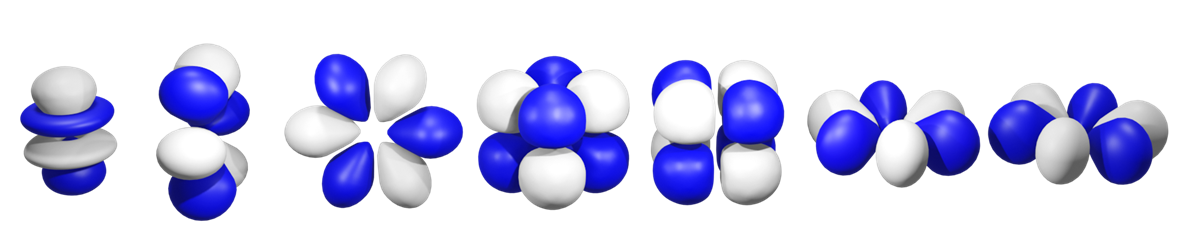
I was frustrated by Chemdraw's lack of ability to render the orbitals in 3D from different angles, especially the f-orbitals, so I made them in blender. Please feel free to download, use and modify these 3D renders; I ask only that you give me credit!
Blender is a free-to-use open-source graphical software package that is powerful for making 3D models. However, it is a little tricky to use as a new user, so I've prepared the tutorial below to help you if you want to change the lobe colors or set up the orbitals in different configurations for your desired image.
Instructions to alter the lobe color
When you first open, for example, p.blend in Blender.exe, it will look like this.

Note that you are in Object mode. If you click on the lobe that you want to change the color for, it will become highlighted in orange (See below). You can only select one object at a time to change the color. Note that at this time, you can only change the color of the blue lobes.

Click on the dropdown menu, and change the mode to Texture Paint.

Hover your mouse over this toolbar highlighted below and scroll to the top.

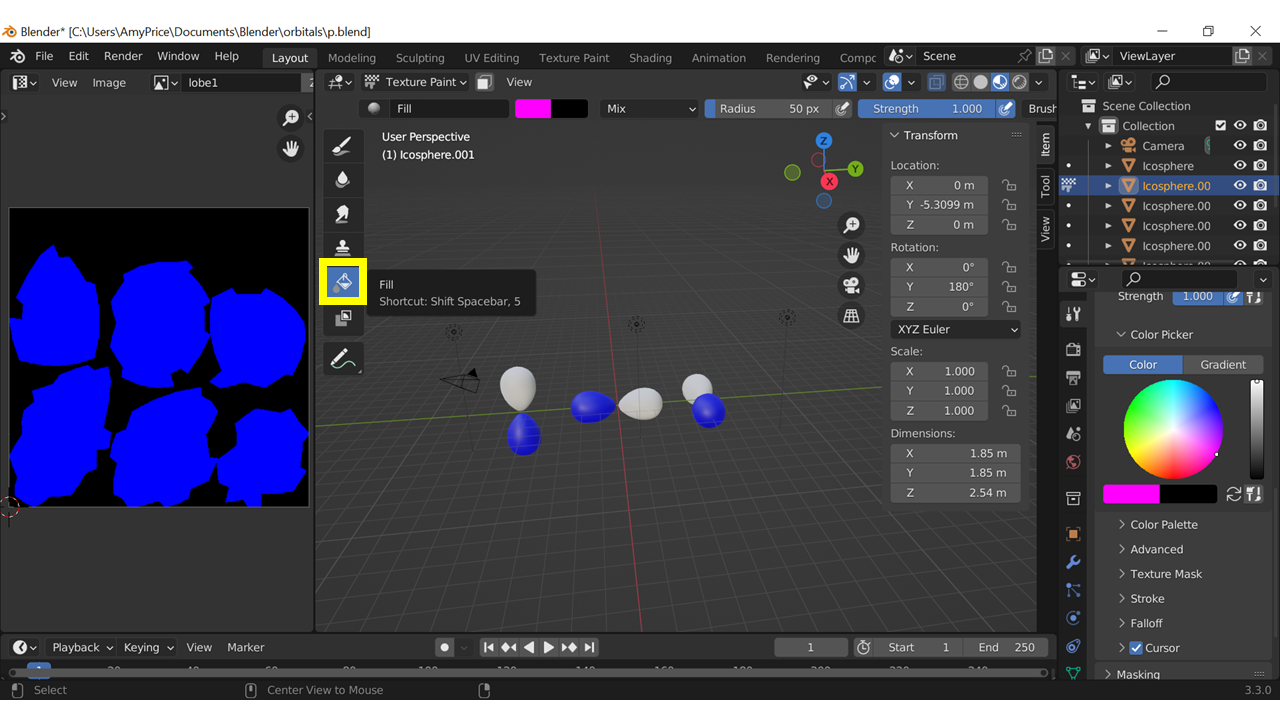
Click on the icon indicated below and then scroll on the menu to the right until you see the color picker. Choose the color you want the orbitals to be by either clicking on the color wheel, or by changing the color values in the button indicated.

Next ensure that the color fill option is selected from the toolbar on the right.
Click on the lobe you originally selected, and voila, you've changed the color! Save the .blend file. For some of the .blend files you may need to repeat these steps for multiple lobes.

Instructions on how to render an image in blender
There are many, many, many tutorials on how to use blender. The instructions that I'm giving you here are really the bare bones, but will hopefully be all you need to render an image of the orbitals yourself, from an orientation that suits your needs.
First some basic controls:
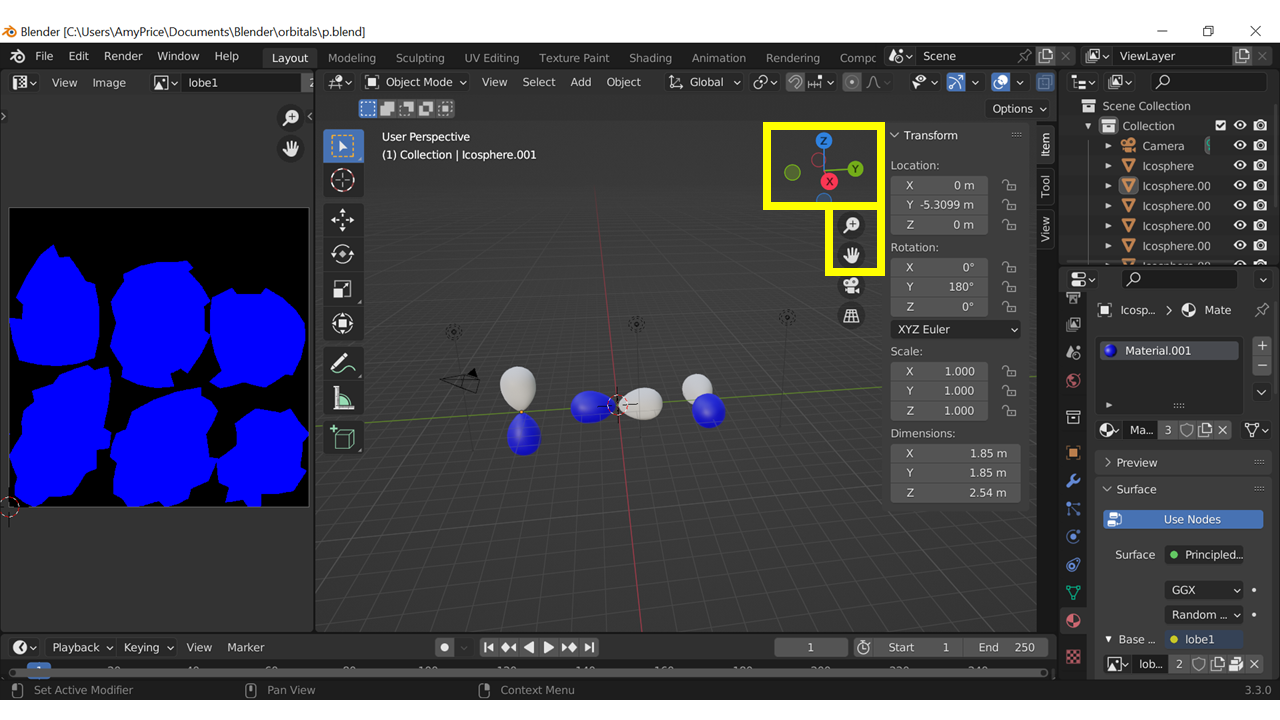
There are many ways to move around the 'scene'; click and hold the middle mouse button while moving the mouse to rotate your view around the orbitals. If you want to pan the camera, click and hold the middle button while pressing shift. To zoom, scroll the middle button of the mouse. There are some clunky ways to do this with a laptop mousepad, but you can also perform all of these operations with your mouse cursor in the top-right of the view-screen. The highlighted xyz orienting tool can be dragged with the mouse to rotate the scene. The little hand button below can be used to pan around the scene, while the magnifying glass controls the zoom.
Next you may want to move objects around! Moving an object is achieved by selecting it, pressing G, and then moving it to the location of your choosing, then left-clicking. Right-clicking at any point before clicking the left-mouse button to cancel the movement of the object. Should you want to move it along the direction of an axis, press G, then the axis, e.g. X, and then move it with the mouse, before left-clicking. Multiple objects can be selected at a time by pressing shift while you left click the objects.

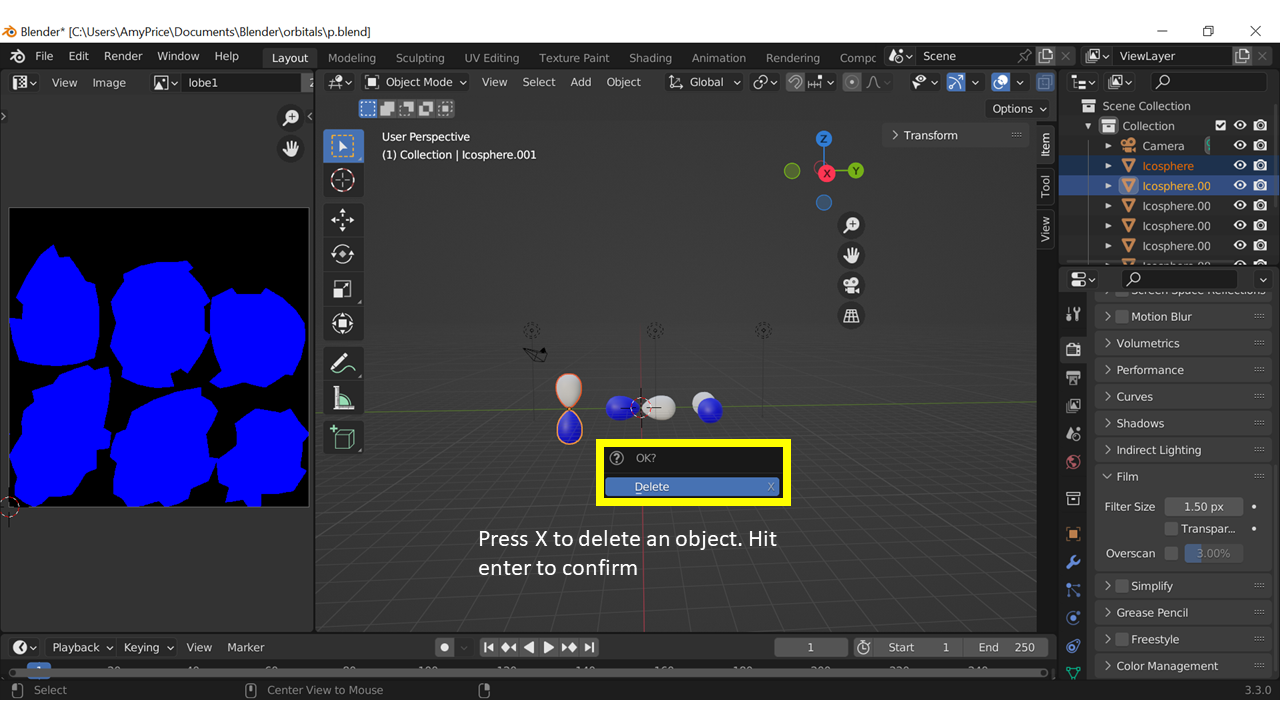
What about deleting objects? That's easy enough- select the object(s) you want to get rid of, and press X. A prompt will come up; hit enter if you are sure you want to delete the object.
Resizing objects is done by clicking the object and then pressing S (for scale). Drag the mouse until it is the size you want, then left-click to confirm the scale change, or right-click to cancel. You can rotate an object by selecting it and then pressing R and dragging the mouse. Again, you can control the axis you rotate around by pressing R then either X, Y or Z. Left-click when you're done, or right click to cancel.


You can copy objects in from other .blend files. Save the file you are currently working in, open the file that contains the object that you want to copy into the first .blend file. Select the objects you want to copy and right-click. Select copy objects. Reopen the first .blend file, right-click and select paste-objects. The objects will be pasted in and selected, allowing you to move them or alter them.

Having set up your 'scene' in the way you want it, now it's time to set up the lighting for the image. Blender allows you to put as many light sources into a scene as you want, and these can be moved around in the same way as objects. Move the lighting to where you would like it. You can preview the render by clicking the highlighted button below (it may already be selected).

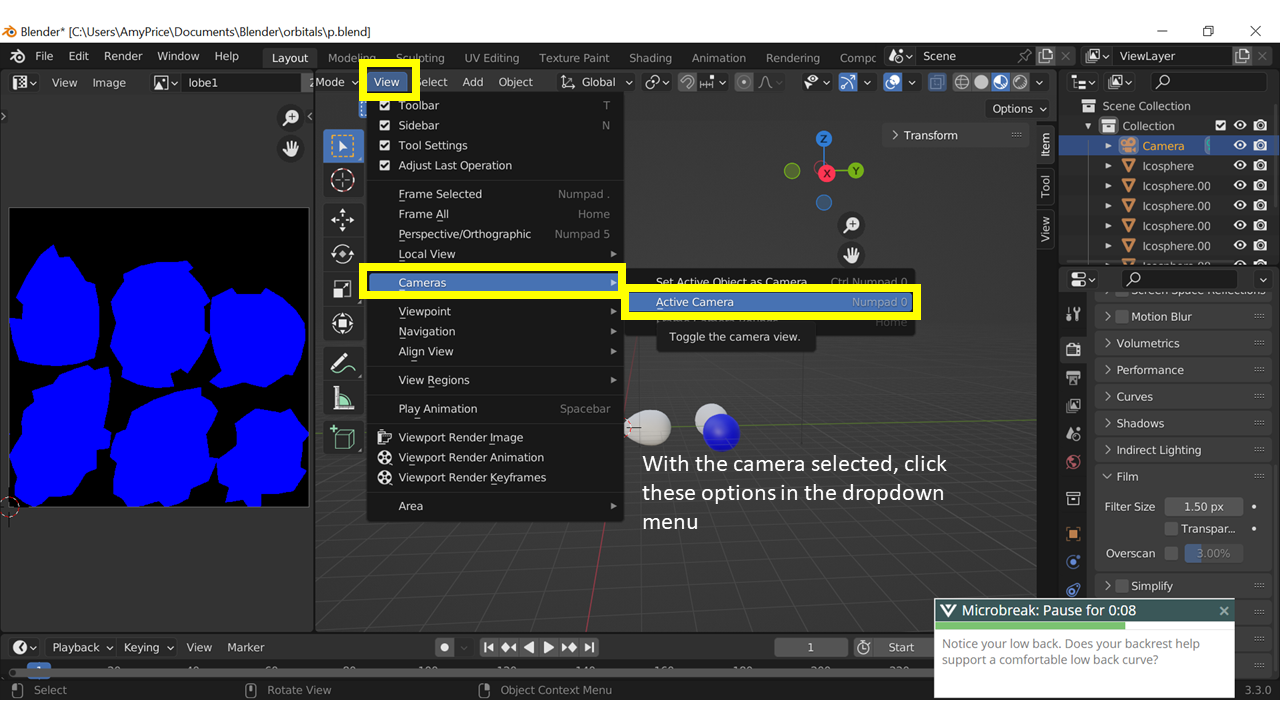
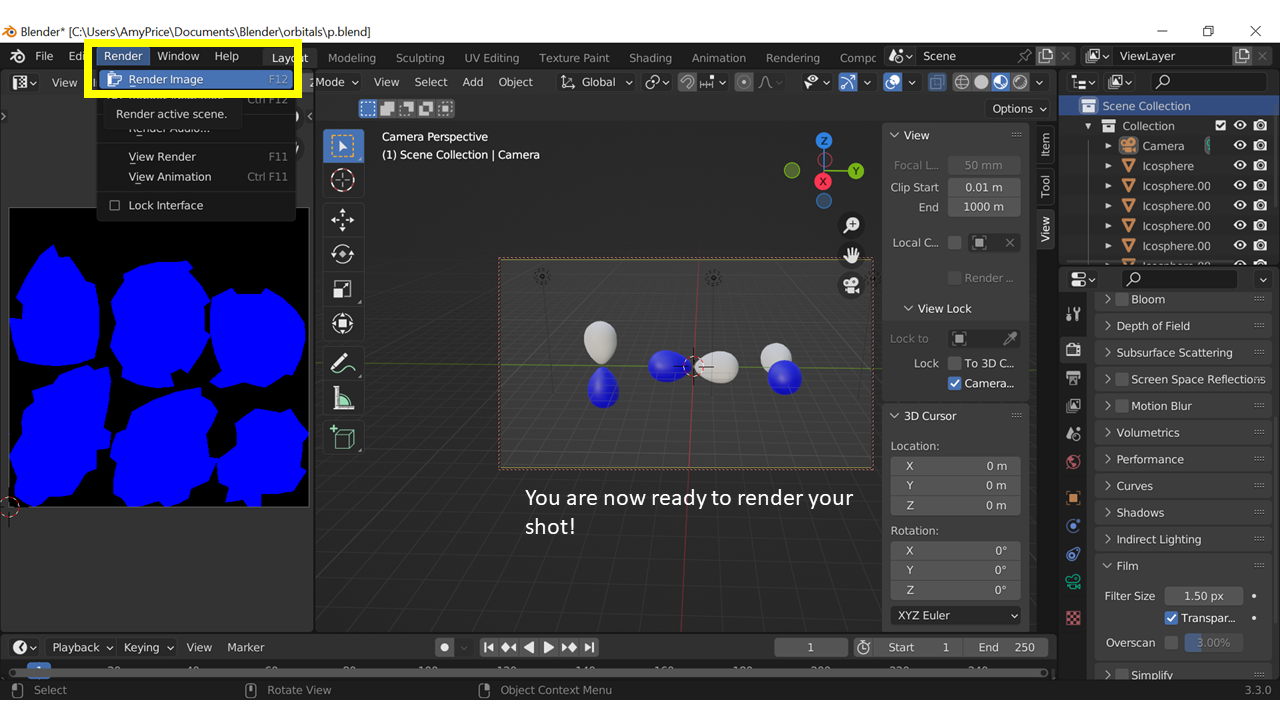
To set up the camera angle to how you want it, it is best to first select the camera. Now click on View>Cameras>Active Camera in the dropdown menu. This switches the view you see to the view that the camera sees. Click here to bind the camera to your viewport e.g. now when you move around the scene the camera will follow your point of view. Set up an angle that you like and click render. A new window will open with a picture of the orbitals.